About \(LaTeX\)
A typesetting language is a language that requires the user to write code that is then 'translated' to a form that is 'human readable'.
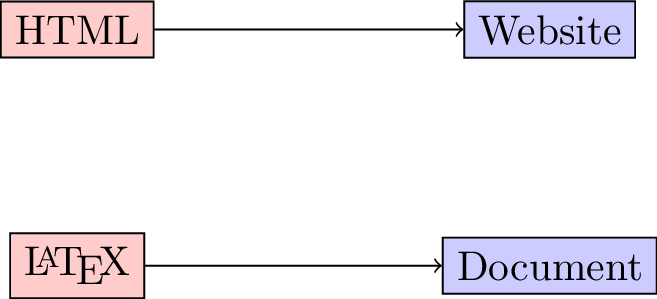
A powerful typesetting language that is popular in scientific writing is \(\LaTeX\) (pronounced: lay-tech).
This resource gives an overview of \(\LaTeX\): you can either install \(\LaTeX\) on your own computer:
If you do not already have an installed version I recommend overleaf.com a cloud based service.
A basic document
(Keywords: documentclass.) Video demo
In the editor type the following:
\documentclass{article}


\begin{document}
Hello, world!
\end{document}
The next step is to compile this tex file. For the purposes of this
tutorial I recommend compiling with a modern compiler like pdflatex or
xelatex. If you are using a cloud based service compilation usually happens
automatically.
Special characters
(Keywords: comments, quote.) Video demo
(Keywords: quotes, characters, comments.)
The following keys are used to type text in a source file:
a-z A-Z 0-9
+ = * / ( ) [ ]
The following punctuation marks:
' ? ! : ` ' -
Finally there are 13 special keys that are used in commands:
# $ % & ~ _ ^ \ { } @ " |
For example, % sign is used to denote comments in LaTeX (like # in Python).
\begin{document} % This line start the document
Note also that to include text in quotes a different character for the opening and closing quote needs to be used:
Here is how to use `single quotes' and here is how to use double ``quotes''.
A document showing these two things together is:
\documentclass{article} % There are various classes of documents, we will see a few later.

\begin{document} % This line start the document
Here is how to use `single quotes' and here is how to use double ``quotes''.
\end{document}
The preamble
(Keywords: preamble.) Video demo
In general all the code that comes before the \begin{document} statement is
called the 'preamble' and is used to set a title for the document, call certain
packages as well as various other things. The following code (to be inserted in
the preamble of your document) sets a title:
\title{Choose a title}
\author{V Knight}
\date{\today}
If you compile your document this won't include the title in the output. To do so you need to include the following line (in the main body):
\maketitle
A full document with this is:
\documentclass{article} % There are various classes of documents, we will see a few later.

\title{The preamble}
\author{V Knight}
\date{\today}

\begin{document} % This line start the document

\maketitle

Hello, world!
\end{document}
An abstract
(Keywords: abstract.) Video demo
The following will add an abstract to your document:
\begin{abstract}
    This document contains some basic LaTeX code that will be useful to me
    in the future.
\end{abstract}
A full version of this is:
\documentclass{article} % There are various classes of documents, we will see a few later.

\title{An abstract}
\author{V Knight}
\date{\today}

\begin{document} % This line start the document

\begin{abstract}
    This document contains some basic LaTeX code that will be useful to me
    in the future.
\end{abstract}

\maketitle

Hello, world!
\end{document}
Lists
(Keywords: lists, bullet points.) Video demo
There are various ways to obtain lists:
\begin{itemize}
    \item Unordered item number 1
    \item Unordered item number 2
\end{itemize}
\begin{enumerate}
    \item Ordered item number 1
    \item Ordered item number 2
\end{enumerate}
A full document with both these lists is:
\documentclass{article}

\title{Writing lists}
\author{V Knight}
\date{\today}

\begin{document}

\maketitle

\begin{itemize}
    \item Unordered item number 1
    \item Unordered item number 2
\end{itemize}

\begin{enumerate}
    \item Ordered item number 1
    \item Ordered item number 2
\end{enumerate}
\end{document}
Note that in LaTeX indentation is not required it is just good practice. Unlike
Python where specific environments are delimited by indentation levels, in
LaTeX they are ended by specific end statements \end{enumerate}.
Tables
(Keywords: tables, tabular, booktabs.) Video demo
The following code creates a simple table (note the c, r, and l tags that
indicate text alignment, experiment by changing these):
\begin{tabular}{|l|c|r|}
    \hline
    Name     & Gender & Start Time\\
    \hline
    Angelico & Male   & 1100\\
    \hline
    Leanne   & Female & 0830\\
    \hline
    Lisa     & Female & 0730\\
    \hline
\end{tabular}
The above makes use of the basic tables available in \(\LaTeX\). The
booktabs packages allows for improved aesthetics. To use this requires
\usepackage{booktabs} in the preamble:
\begin{tabular}{l|c|r|}
    \toprule
    Name        & Gender & Start Time\\
    \midrule
    Angelico    & Male   & 1100\\
    Leanne      & Female & 0830\\
    Lisa        & Female & 0730\\
    \bottomrule
\end{tabular}
A full document with this table is:
\documentclass{article}

\usepackage{booktabs}

\title{Tables}
\author{V Knight}
\date{\today}

\begin{document}

\maketitle

A normal table:

\begin{tabular}{|l|c|r|}
    \hline
    Name     & Gender & Start Time\\
    \hline
    Angelico & Male   & 1100\\
    \hline
    Leanne   & Female & 0830\\
    \hline
    Lisa     & Female & 0730\\
    \hline
\end{tabular}

A table with the booktabs package:

\begin{tabular}{l|c|r|}
    \toprule
    Name        & Gender & Start Time\\
    \midrule
    Angelico    & Male   & 1100\\
    Leanne      & Female & 0830\\
    Lisa        & Female & 0730\\
    \bottomrule
\end{tabular}

\end{document}
In general in LaTeX \\ is used to denote a 'new line'.
Including pictures
(Keywords: pictures, jpg, png, graphicx.) Video demo
To include a picture is straightforward in LaTeX. We make use of the graphicx
package. In LaTeX packages are included in the preamble using usepackage.
Include the following in the preamble:
\usepackage{graphicx}
The following code (somewhere in the body) will include a picture:
\includegraphics{path_to_picture}
We can put this in the center environment to centre the picture:
\begin{center}
    \includegraphics{path_to_picture}
\end{center}
We can also pass options to includegraphics to specify the width. For example,
this ensures the picture will be 60% of the width of the page:
\begin{center}
    \includegraphics[width=.6\textwidth]{path_to_picture}
\end{center}
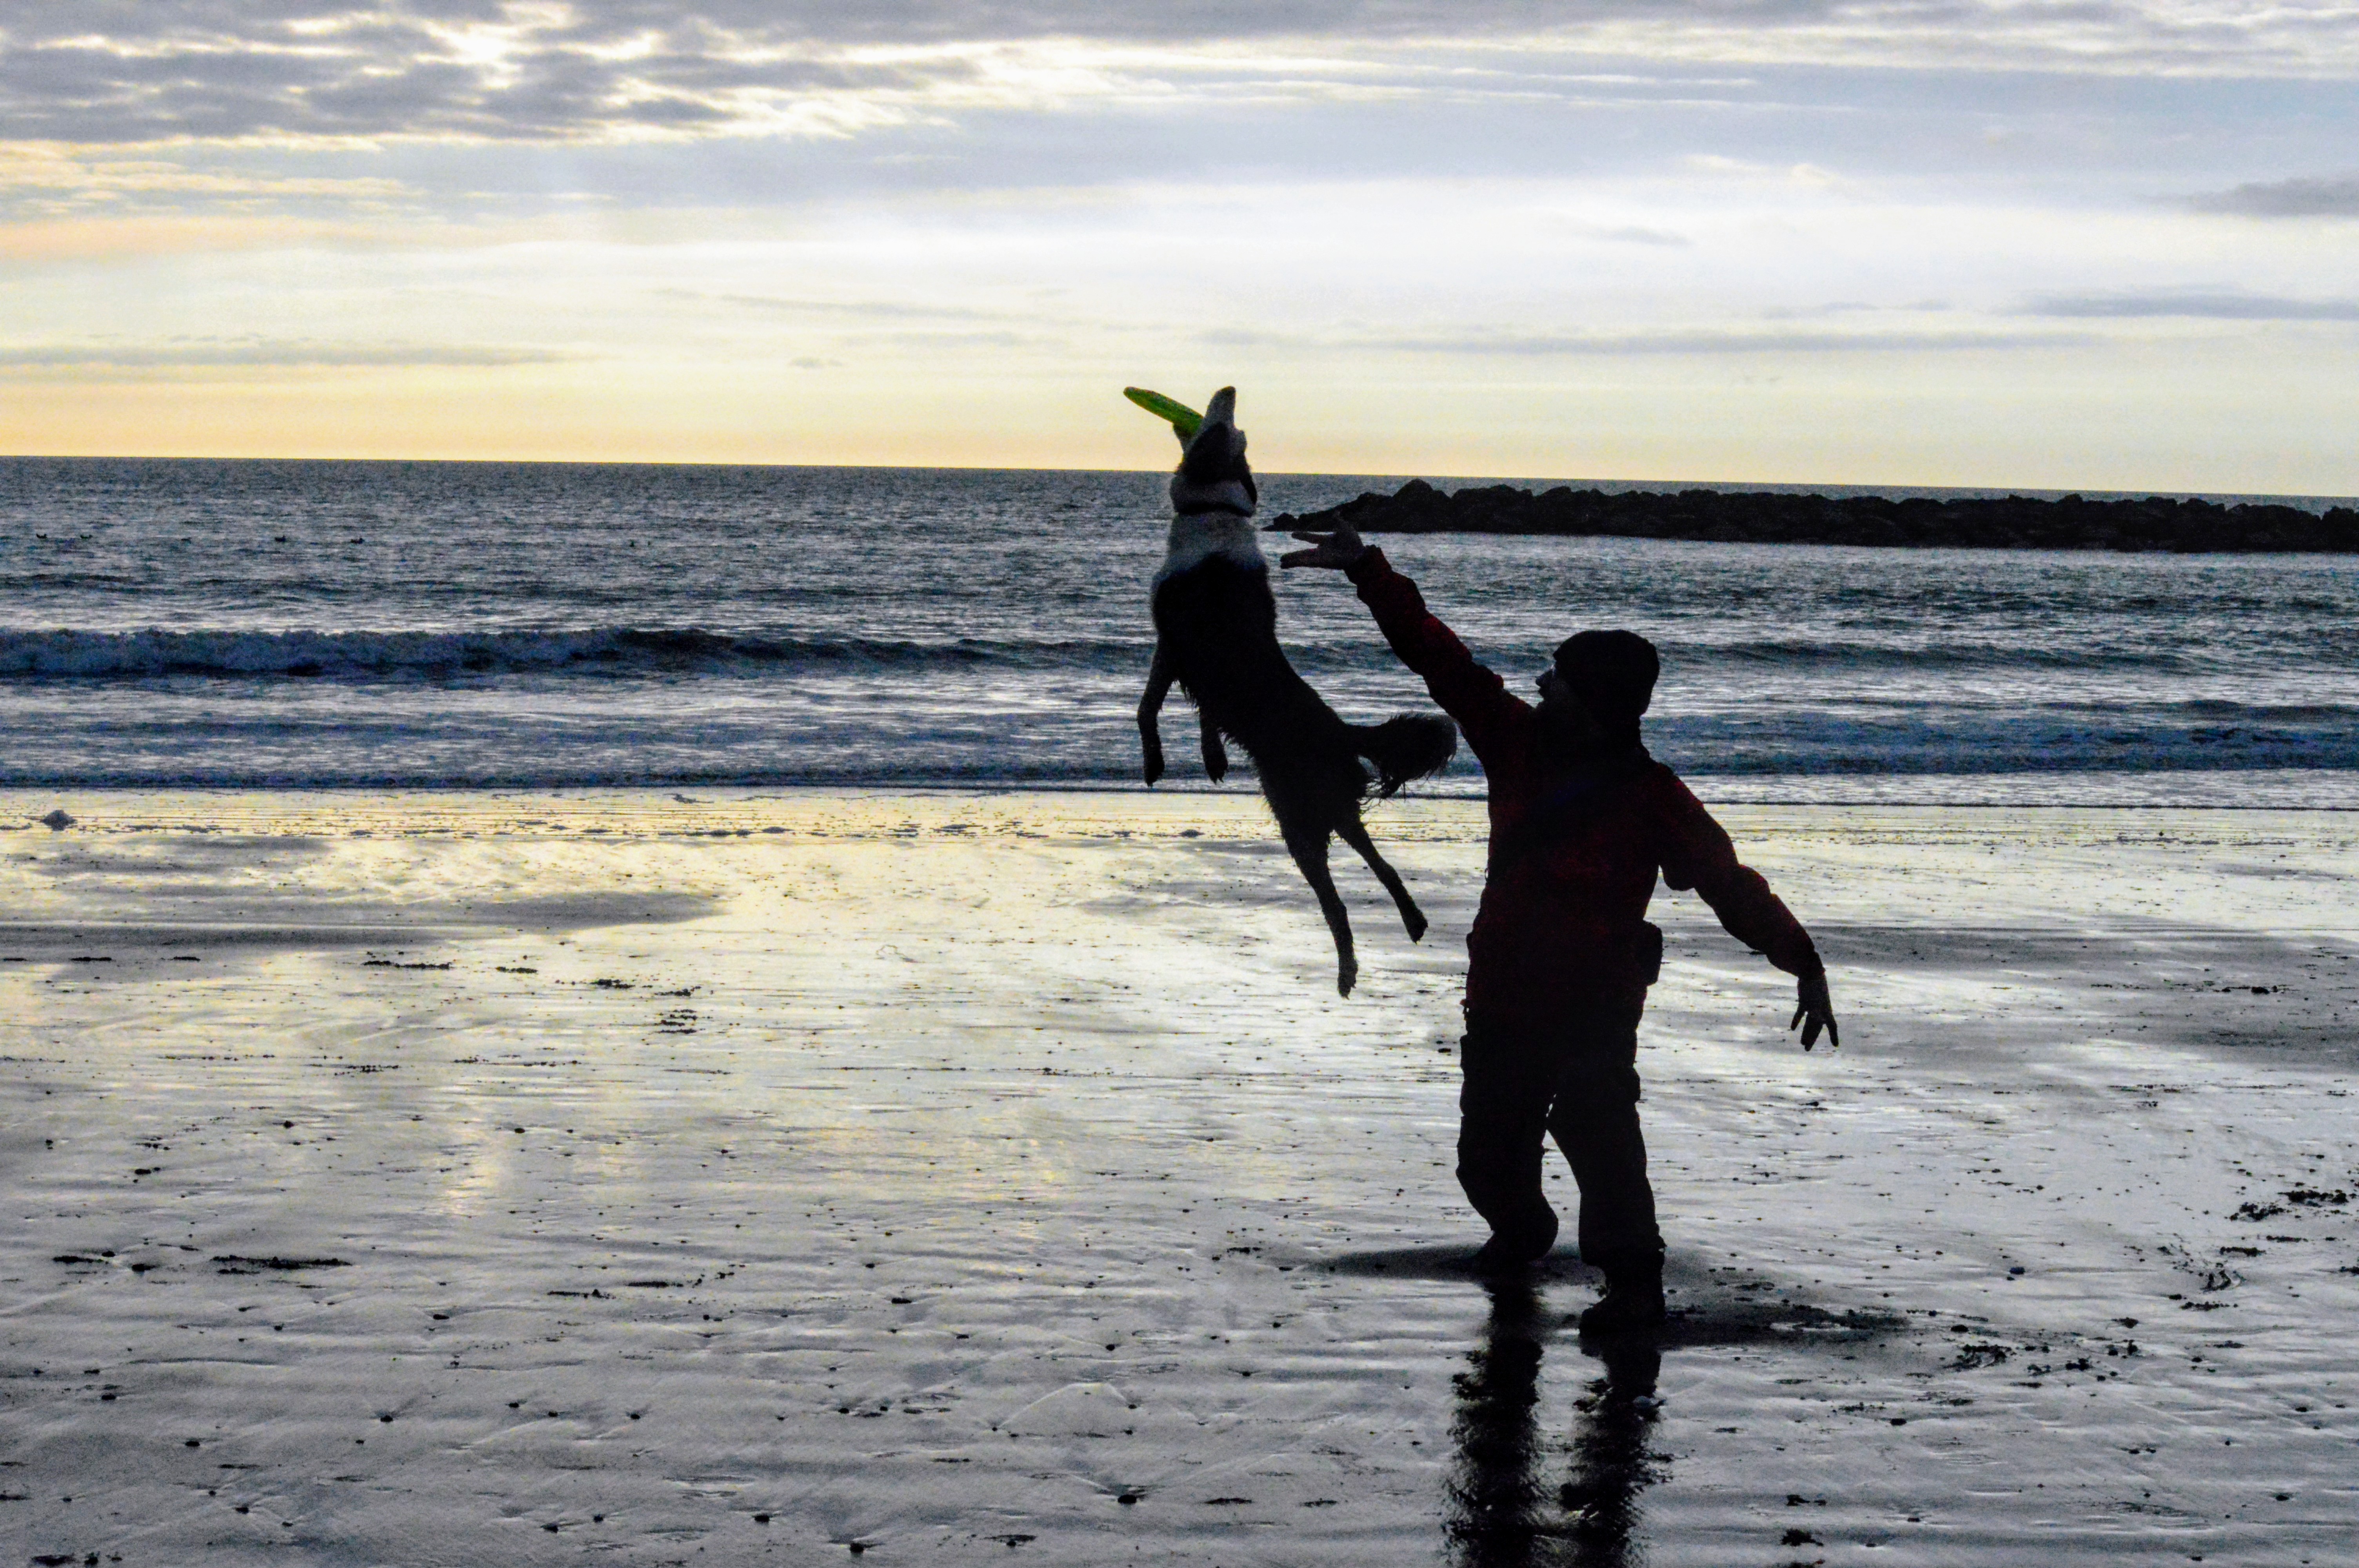
Here is an example image:
Images can be in jpg, png and pdf format when using a modern compiler, here is a picture as an example: dog.jpg.
A full document with that images is:
\documentclass{article}

\usepackage{graphicx}

\title{Including images}
\author{V Knight}
\date{\today}

\begin{document}

\maketitle

\begin{center}
    \includegraphics[width=.6\textwidth]{dog.jpg}
\end{center}

\end{document}
Drawing pictures
(Keywords: tikz, diagrams.) Video demo
Graphs, pictures and diagrams can thus be created in any software of choice
(Python, inkscape, etc...) and then included as required but it
is often easier to draw a picture in LaTeX itself using code. A great package
to do this with is tikz. Include the following in the preamble:
\usepackage{tikz}
Using this package we start a picture by setting up a tikzpicture environment.
\begin{tikzpicture}

\end{tikzpicture}
We then draw various shapes and connectors using the \draw command including
coordinates:
\begin{tikzpicture}
    \draw (0,0) -- (0,2); % This draws a line from (0,0) to (0,2)
    \draw (-1,1) -- (1,1); % This draws a line from (-1,1) to (1,1)
    \draw (0,0) -- (1,-1); % This draws a line from (0,0) to (1,-1)
    \draw (0,0) -- (-1,-1); % This draws a line from (0,0) to (-1,-1)
    \draw (0,2.5) circle(.5); % This draws a circle at (0,2.5) with radius .5
\end{tikzpicture}
This is very much touching the surface of what can be down with tikz. The simplest next step is to include various color and thickness options (we can also center the drawing):
\begin{center}
    \begin{tikzpicture}
        \draw [ultra thick] (0,0) -- (0,2); % This draws a line from (0,0) to (0,2)
        \draw [thin, color=blue] (-1,1) -- (1,1); % This draws a line from (-1,1) to (1,1)
        \draw [thick] (0,0) -- (1,-1); % This draws a line from (0,0) to (1,-1)
        \draw [thick] (0,0) -- (-1,-1); % This draws a line from (0,0) to (-1,-1)
        \draw [color=red, fill=green] (0,2.5) circle(.5); % This draws a circle at (0,2.5) with radius .5
    \end{tikzpicture}
\end{center}
A lot more can be done with tikz and there are a variety of great examples, tutorials online.
A full document with that images is:
\documentclass{article}

\usepackage{tikz}

\title{Drawing with tikz}
\author{V Knight}
\date{\today}

\begin{document}

\maketitle

\begin{center}
    \begin{tikzpicture}
        \draw [ultra thick] (0,0) -- (0,2); % This draws a line from (0,0) to (0,2)
        \draw [thin, color=blue] (-1,1) -- (1,1); % This draws a line from (-1,1) to (1,1)
        \draw [thick] (0,0) -- (1,-1); % This draws a line from (0,0) to (1,-1)
        \draw [thick] (0,0) -- (-1,-1); % This draws a line from (0,0) to (-1,-1)
        \draw [color=red, fill=green] (0,2.5) circle(.5); % This draws a circle at (0,2.5) with radius .5
    \end{tikzpicture}
\end{center}

\end{document}
Floats and captions
(Keywords: floats, moving figures, moving tables, label.) Video demo
When including images, pictures and tables it is beneficial to make them standalone objects that can be referred to throughout the text. This is done in \(\LaTeX\) using the concepts of "floats".
Pictures and diagrams are figures:
Figure~\ref{my_picture} shows a picture.

\begin{figure}
    \begin{center}
        \includegraphics{path_to_picture}
    \end{center}
    \caption{A picture}
    \label{my_picture}
\end{figure}
Tables are tables:
Table~\ref{my_table} shows a table.


\begin{table}
    \begin{center}
        \begin{tabular}{l|c|r|}
            \toprule
            Name        & Gender & Start Time\\
            \midule
            Angelico    & Male   & 1100\\
            Leanne      & Female & 0830\\
            Lisa        & Female & 0730\\
            \bottomrule
        \end{tabular}
    \end{center}
    \caption{A table}
    \label{my_table}
\end{table}
Note that these are called "floats" because they are designed to move in the
document to ensure the best use of space. As a result of this it is good
practice to not refer to floats by relative position. For example do not use:
in the picture below but in Figure~\ref{my_picture}.
\(LaTeX\) will aim to place floats in an efficient manner however some of the rules it follows can be broken by passing the following options:
h: try to place the float where it is indicated by the code.t: the float can be allowed in the top of the page.b: the float can be allowed in the bottom of the page.p: the float can be allowed on a page or column by itself.!: some further restrictions should be ignored.
A full document with a figure and a table, using all those options is (this uses this image: cat.jpg):
\documentclass{article}

\usepackage{graphicx}
\usepackage{booktabs}

\title{Captions and floats}
\author{V Knight}
\date{\today}

\begin{document}

\maketitle

Figure~\ref{my_picture} shows a cat.

\begin{figure}[!htbp]
    \begin{center}
        \includegraphics[width=.6\textwidth]{cat.jpg}
    \end{center}
    \caption{A cat}
    \label{my_picture}
\end{figure}

Table~\ref{my_table} shows a table.

\begin{table}[!hbtp]
    \begin{center}
        \begin{tabular}{|l|c|}
            \toprule
            Name    & Animal \\
            \midrule
            Auraya  & dog \\
            Chick   & cat \\
            Duck    & cat \\
            Riggins & dog \\
            \bottomrule
        \end{tabular}
    \end{center}
    \caption{A table of pets}
    \label{my_table}
\end{table}

\end{document}
Sections
(Keywords: sections, subsections, label.) Video demo
It is possible to organise parts of a document using 'sections':
\section{My first section}

This is a section with a few subsections.

    \subsection{A part of my first section}

    Here I could write about the problem I'm trying to solve.

    \subsection{Another part of my first section}

    In this subsection I could solve the problem.

        \subsubsection{Further fragmentation...}

\section{My second section}

etc...
We can include labels to sections so that we can refer to them:
\section{My first section}\label{first_section}

\section{My second section}\label{second_section}

In Section \ref{first_section} we saw that...
When compiling one needs to compile twice:
- The first time to find all the labels;
- The second time to match the labels to the references.
If you are using a web service (like overleaf) then this usually happens automatically.
Note, labels can be using in conjunction with tabular (for tables) and
figure (for images) environments, these are called "floats" and are a very
useful feature of LaTeX but are not covered here.
A full document with sections is:
\documentclass{article}

\title{Sections}
\author{V Knight}
\date{\today}

\begin{document}

\maketitle

\section{My first section}\label{first_section}

This is a section with a few subsections.

    \subsection{A part of my first section}

    Here I could write about the problem I'm trying to solve.

    \subsection{Another part of my first section}

    In this subsection I could solve the problem.

        \subsubsection{Further fragmentation...}

\section{My second section}\label{second_section}

In Section \ref{first_section} we saw that...
\end{document}
Bibliographies
(Keywords: bibtex, bibliography, cite.) Video demo
To create a bibliography we need to store the bibliographic information in a separate 'bibtex' file. In this file you include bibliographic information for the various references you might have.
The following is the code for a book on LaTeX. Save the following in a
separate file: bibliography.bib:
@book{Gratzer2007,
    author = {Gr\"{a}tzer, George},
    publisher = {Springer},
    title = {{More Math Into LaTeX: A Guide for Documentation and Presentation}},
    year = {2007}
}
We can then reference the 'key' (for the above it is Gratzer2007) for any document in the bibliography file using the following:
A very helpful reference for LaTeX is \cite{Gratzer2007}.
Note that there are a variety of tools that will give you bibtex code for any given reference (Google Scholar, JabRef, Zotero, Mendeley etc...).
We need to however include a pointer towards the bibliography, at the end of the document include:
\bibliographystyle{plain}
\bibliography{bibliography.bib}
We now need to compile a document twice (as above to find all internal
references for sections, figure etc...) and then we compile the
bibliography with bibtex and then we need to compile one last time to match
the bibliography items with the citations.
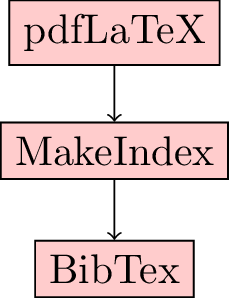
If you are using overleaf then this happens automatically.
A full document with sections is:
\documentclass{article}

\title{Bibliographies}
\author{V Knight}
\date{\today}

\begin{document}

\maketitle

A very helpful reference for LaTeX is \cite{Gratzer2007}.

\bibliographystyle{plain}
\bibliography{bibliography.bib}
\end{document}
Inline mathematics
(Keywords: mathematics, inline.) Video demo
Typesetting mathematics is \(\LaTeX\)'s strength. Here is an example of including some "inline" mathematics:
Mathematics can be typed in to \LaTeX\ as $x^2$ and/or
\((a+b)^2=a^2+2ab+b^2\).
Note that using \( and \) is preferred over $. One of the reasons is that
it is easier for humans (and machines) to find the start and end of some
mathematics.
A full document making use of inline mathematics is:
\documentclass{article}

\title{Inline mathematics}
\author{V Knight}
\date{\today}

\begin{document}

\maketitle

Mathematics can be typed in to \LaTeX\ as $x^2$ and/or \((a+b)^2=a^2+2ab+b^2\).
\end{document}
Displayed mathematics
(Keywords: mathematics, display.) Video demo
To include mathematics in a "displayed" style use the following:
Here is an integral:

\[
    \int_{0}^{5}x ^ 2dx
\]

Here is a summation:

$$
    \sum_{i=1}^{n}i=\frac{n(n+1)}{2}
$$
Note that using \[ and \] is preferred over $$. One of the reasons is that
it is easier for humans (and machines) to find the start and end of some
mathematics.
A full document making use of displayed mathematics is:
\documentclass{article}

\title{Displayed mathematics}
\author{V Knight}
\date{\today}

\begin{document}

\maketitle

Here is an integral:

\[
    \int_{0}^{5}x ^ 2dx
\]

Here is a summation:

$$
    \sum_{i=1}^{n}i=\frac{n(n+1)}{2}
$$
\end{document}
Equations
(Keywords: mathematics, equations, label.) Video demo
Mathematics can also be included in equations and referred to as for sections:
\begin{equation}\label{my_first_equation}
e=mc^2
\end{equation}

In equation (\ref{my_first_equation}) we have a very well known relationship!
A full document making use of equations is:
\documentclass{article}

\title{Equations}
\author{V Knight}
\date{\today}

\begin{document}

\maketitle

\begin{equation}\label{my_first_equation}
    e=mc^2
\end{equation}

In equation (\ref{my_first_equation}) we have a very well known relationship.
\end{document}
Text in mathematics
(Keywords: text, mbox, mathematics.) Video demo
To include text within mathematics we can use the text
command from the amsmath package:
\[
    x^2 = 1 \text{ implies} x=\pm 1
\]
Be sure to include usepackage{amsmath} in the preamble.
Another command that does this is mbox which does not require the amsmath package.
A full document making use of \text is:
\documentclass{article}

\usepackage{amsmath}

\title{Text within mathematics}
\author{V Knight}
\date{\today}

\begin{document}

\maketitle

\[
    x^2 = 1 \text{ implies} x=\pm 1
\]
\end{document}
Arithmetic operators
(Keywords: arithmetic, mathematics.) Video demo
Arithmetic operators are available in \(\LaTeX\):
\begin{itemize}
    \item \(a+b\)
    \item \(a-b\)
    \item \(-a\)
    \item \(ab\)
    \item \(a\cdot b\)
    \item \(a\times b\)
    \item \(a/b\)
    \item \({a\over b}\)
    \item \(\frac{a}{b}\)
\end{itemize}
A full document showing these is:
\documentclass{article}

\title{Arithmetic operators}
\author{V Knight}
\date{\today}

\begin{document}

\maketitle

\begin{itemize}
    \item \(a+b\)
    \item \(a-b\)
    \item \(-a\)
    \item \(ab\)
    \item \(a\cdot b\)
    \item \(a\times b\)
    \item \(a/b\)
    \item \({a\over b}\)
    \item \(\frac{a}{b}\)
\end{itemize}
\end{document}
Matrices
(Keywords: matrices, linear algebra, mathematics.) Video demo
The following code gives a 3 by 2 matrix:
\[
    \begin{pmatrix}
        a&b\\
        c&d\\
        e&f\\
    \end{pmatrix}
\]
Note that this requires the amsmath package.
Other types of matrices can be obtained used \begin{matrix} and
begin{vmatrix}.
A full document showing these is:
\documentclass{article}

\usepackage{amsmath}

\title{Matrices}
\author{V Knight}
\date{\today}

\begin{document}

\maketitle

\[
    \begin{pmatrix}
        a&b\\
        c&d\\
        e&f\\
    \end{pmatrix}
\]

\[
    \begin{matrix}
        a&b\\
        c&d\\
        e&f\\
    \end{matrix}
\]

\[
    \begin{vmatrix}
        a&b\\
        c&d\\
        e&f\\
    \end{vmatrix}
\]
\end{document}
Aligned mathematics
(Keywords: aligned, label, mathematics.) Video demo
It is possible to create aligned mathematics using:
\begin{align}
    (x+h)^2-x^2 & =x^2+2xh+h^2-x^2 \nonumber\\
                & =2xh+h^2 \nonumber\\
                & =h(2x+h) \nonumber
\end{align}
Note that this requires the amsmath package.
Annotated text can also be added:
\begin{align}
    (x+h)^2-x^2 & = x^2+2xh+h^2-x^2 && \text{(by distributivity)}\\
                & = 2xh+h^2         && \text{(by subtraction)}\\
                & = h(2x+h)         && \text{(by factorisation)}
\end{align}
A full document showing these is:
\documentclass{article}

\usepackage{amsmath}

\title{Aligned mathematics}
\author{V Knight}
\date{\today}

\begin{document}

\maketitle

Some examples of aligned mathematics:

\begin{align}
    (x+h)^2-x^2 & =x^2+2xh+h^2-x^2 \nonumber\\
                & =2xh+h^2 \nonumber\\
                & =h(2x+h) \nonumber
\end{align}


Some explanatory text:

\begin{align}
    (x+h)^2-x^2 & = x^2+2xh+h^2-x^2 && \text{(by distributivity)}\\
                & = 2xh+h^2         && \text{(by subtraction)}\\
                & = h(2x+h)         && \text{(by factorisation)}
\end{align}
\end{document}
Partitioned statements
(Keywords: partitioned, mathematics.) Video demo
It is possible to create partitioned statements for case dependent expressions:
\[
    1 + (-1) ^ n =
        \begin{cases}
            0, & \text{if \(n\) odd}\\
            2, & \text{if \(n\) even}
        \end{cases}
\]
Note that this requires the amsmath package.
A full document showing this is:
\documentclass{article}

\usepackage{amsmath}

\title{Partitioned statements}
\author{V Knight}
\date{\today}

\begin{document}

\maketitle

\[
    1 + (-1) ^ n =
        \begin{cases}
            0, & \text{if \(n\) odd}\\
            2, & \text{if \(n\) even}
        \end{cases}
\]
\end{document}
Page formatting
(Keywords: header, margin, footer, page, geometry.) Video demo
It is possible to modify margins, footer and header size of \(\LaTeX\) pages.
This is done using the geometry package.
\usepackage[margin=1.5cm, includefoot, footskip=30pt]{geometry}
This sets a margin size, include a footer and sets the distance between the text and the footer.
There are numerous other options that can be passed to the geometry package. Some of these are:
textwidth: The width of the textheadheight: Height of the headertop: Distance from text to top
A full document showing this is:
\documentclass{article}

\usepackage[margin=1.5cm, includefoot, footskip=30pt]{geometry}

\title{Page formatting}
\author{V Knight}
\date{\today}

\begin{document}

\maketitle

\end{document}
Presentations
(Keywords: beamer, presentations.) Video demo
It is possible to create high quality presentations in \(LaTeX\). To do this
we use the beamer document class:
\documentclass{beamer}
\begin{document}

\frame{This is my first slide.}

\frame{This is my second slide.}

\end{document}
It is possible to select from a number of different themes (and make your own):
\usetheme{default}
\usetheme{Boadilla}
\usetheme{Madrid}
\usetheme{Montpellier}
\usetheme{Warsaw}
\usetheme{Copenhagen}
\usetheme{Goettingen}
\usetheme{Hannover}
\usetheme{Berkeley}
A full document showing this is:
\documentclass{beamer}

\usetheme{Boadilla}

\begin{document}

\frame{This is my first slide.}

\frame{This is my second slide.}

\end{document}
Titles and sections with presentations
(Keywords: beamer, presentations, titlepage.) Video demo
Most of the LaTeX code you have learnt so far an be used without much change in
a beamer presentation within the frame environment. There are however a few
particularities:
To make a title, you need to use the \titlepage instead of the \maketitle command:
\frame{
    \titlepage
}
We can also have frame titles and sections as before in a Beamer document:
\frame{\frametitle{Overview}
    \tableofcontents
}

\section{Simple Beamer}
\frame{\frametitle{My first slide}}
There are various other commands and tools that can be used in Beamer. In
particular take a look at the pause, only and onslide commands.
A full document showing this is:
\documentclass{beamer}

\usetheme{Boadilla}

\title{Beamer with sections and titles}
\author{V Knight}
\date{\today}


\begin{document}

\frame{
    \titlepage
}


\frame{\frametitle{Overview}
    \tableofcontents
}

\section{Simple Beamer}

\frame{\frametitle{My first slide}}

\end{document}
Including code
(Keywords: code, listing.)
It is possible to include code in \(\LaTeX\).
One approach is to use the listings library. To use this requires
\usepackage{listings} in the preamble:
\begin{lstlisting}
def fibonacci(n):
    if n in [0, 1]:
        return 1
    return fibonacci(n - 1) + fibonacci(n - 2)

for n in range(5):
    print(n, fibonacci(n))
\end{lstlisting}
Another approach is to use the minted library. To use this requires
\usepackage{minted} in the preamble:
\begin{minted}{python}
def fibonacci(n):
    if n in [0, 1]:
        return 1
    return fibonacci(n - 1) + fibonacci(n - 2)

for n in range(5):
    print(n, fibonacci(n))
\end{minted}
A full document showing these is:
\documentclass{article}

\title{Include code}
\author{V Knight}
\date{\today}

\usepackage{listings}
\usepackage{minted}

\begin{document}

\maketitle


\begin{lstlisting}
def fibonacci(n):
    if n in [0, 1]:
        return 1
    return fibonacci(n - 1) + fibonacci(n - 2)

for n in range(5):
    print(n, fibonacci(n))
\end{lstlisting}

The minted library is an alternative approach:

\begin{minted}{python}
def fibonacci(n):
    if n in [0, 1]:
        return 1
    return fibonacci(n - 1) + fibonacci(n - 2)

for n in range(5):
    print(n, fibonacci(n))
\end{minted}


\end{document}
Using columns
(Keywords: columns, side by side,)
It is possible to use columns in \(\LaTeX\).
This can be done using the usepackage{multicol} package.
\begin{multicols}{3}

    Here is some text in the first column.

    \columnbreak

    Here is an equation in the second column:

    \[
        x ^ 2
    \]

    \columnbreak

    Here is some text in the third column.

\end{multicols}
A full document showing this is:
\documentclass{article}

\title{Using columns}
\author{V Knight}
\date{\today}

\usepackage{multicol}

\begin{document}

\maketitle

\begin{multicols}{3}

    Here is some text in the first column.

    \columnbreak

    Here is an equation in the second column:

    \[
        x ^ 2
    \]

    \columnbreak

    Here is some text in the third column.

\end{multicols}


\end{document}
Further materials
- YouTube playlist with all videos
- Tutorial by Geraint Palmer
- Welsh language tutorial by Geraint Palmer
- Overleaf introduction to \(\LaTeX\)
- A blog post about moving floats
- Small Guide to Making Nice Tables
- Writing Science with \(LaTeX\)