Using github
Whilst git is a powerful and important tool to use even when working on a
project alone it becomes very powerful when working in collaboration with
others. In particular the notion of working on parallel branches extends to
different individuals working on parallel branches.
To do this, we genuinely use a remote version of the repository. This can be
anywhere, even a copy of the repository in another folder on your computer.
One of the most popular remote services is called github.
Note that the entire history of any copy of a git repository always
travels with that repository.
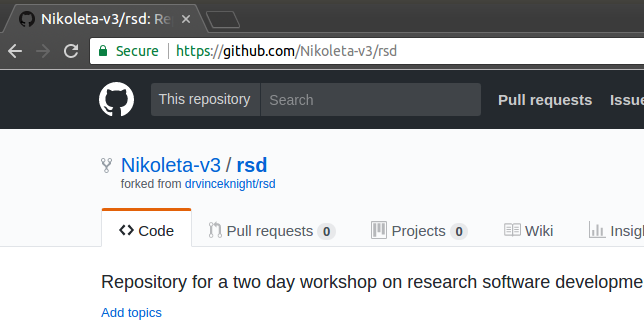
Forking a repository
The notes you are currently reading are on github:
github.com/drvinceknight/rsd.
Let us start by creating your own copy of that repository.
After signing in to github, click on Fork button.
This then creates a copy of the repository under your account.
Cloning a repository
Now let us clone this repository locally: so that you will have your own copy of it.
Click on Clone or Download and copy the https address of this repository:
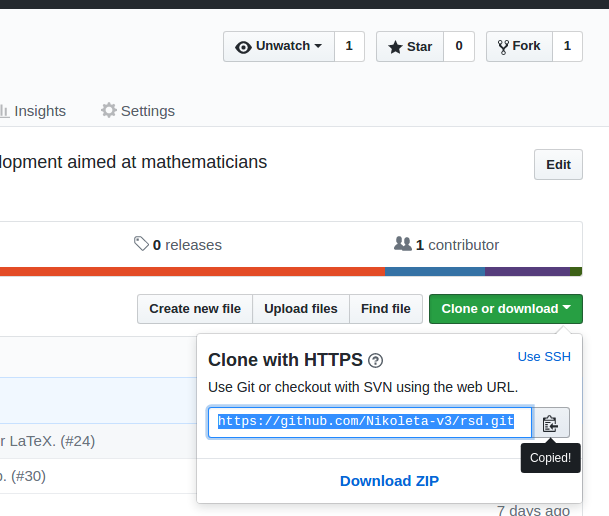
Exit any previous directories and open your command line and type:
git clone <copied-address>
You should see something like this:
git clone https://github.com/<github-username>/rsd.git
Cloning into 'rsd'...
remote: Counting objects: 222, done.
remote: Compressing objects: 100% (105/105), done.
remote: Total 222 (delta 64), reused 107 (delta 32), pack-reused 67
Receiving objects: 100% (222/222), 202.14 KiB | 0 bytes/s, done.
Resolving deltas: 100% (84/84), done.
Checking connectivity... done.
This creates a copy of all the source files for the course. You're welcome to
look around and see the source files. Note that you can also type git log to
see the entire history of how the course was written.
Making changes
If you go to participants list you can see a list of everyone who has participated in this course. You are now going to add yourself to that list.
First branch:
git branch add-<my-name>-to-participant-list
git checkout add-<my-name>-to-participant-list
Now navigate to src/participants/. There you can see some .md files. Copy
one of them:
cp vince.md <my-name>.md
Open that file with your editor and modify it to describe yourself.
Once that is done, let us commit that change:
git add <my-name>.md
git commit
A sensible commit message would be something like:
Add <my-name> as list of participants

I took part in the course on <date>.
This change only exists on your computer. For it to make it to the main course website, someone with control over the course website needs to be merge the changes in.
So you now need to "request" that that merge happens. Github offers the capability to do this using what is called a "Pull request" (PR)
Making a Pull Request
First we need to send the changes from your computer back to your remote copy.
Let us see what git knows about the remote:
git remote -v
(The -v is short for "verbose")
This gives:
origin  [email protected]:drvinceknight/rsd.git (fetch)
origin  [email protected]:drvinceknight/rsd.git (push)
This shows that we have a single remote with short alias origin (note the
actual address you see might be different).
We want to push to that remote:
git push origin add-<my-name>-to-participant-list
After running that command and authenticating your changes will be on your own branch:
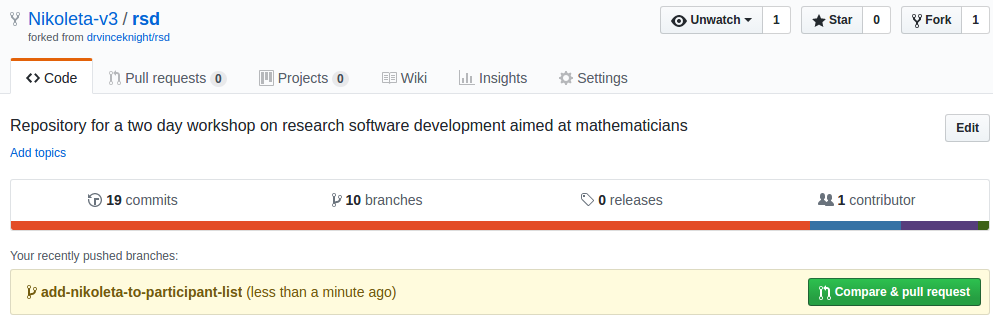
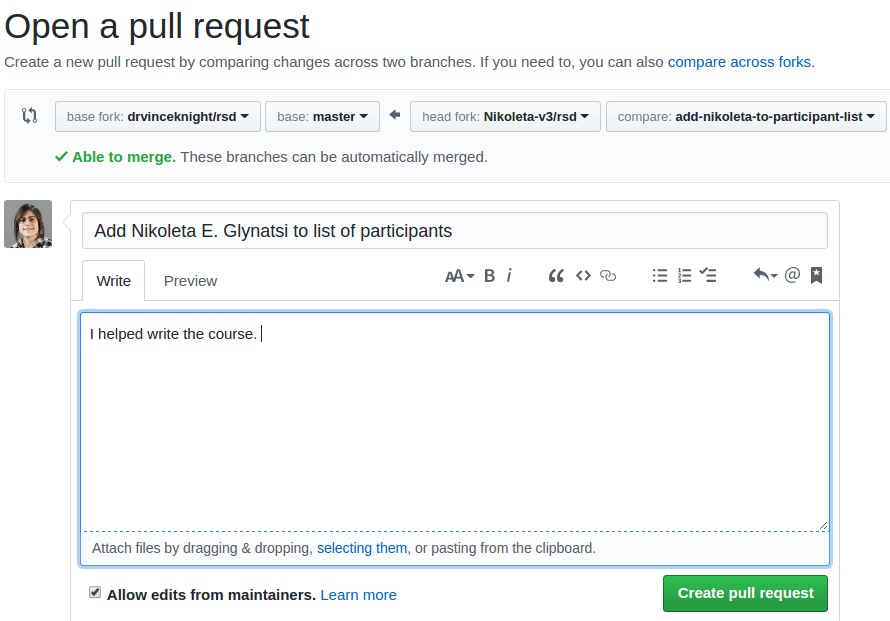
Now you are ready to request that changes be merged. To do this, click on the "Compare and pull request" button and then write a message.
When opening a PR you might notice that github will attempt to use the commit messages to enter the text in the PR message. This can be helpful but no matter what before clicking the "Open a PR" button try to ensure that you message follows these principles:
- Include the purpose of the PR:
this change to the code base will... - Ask for specific feedback:
I attempted to do ... but would appreciate specific feedback on that... - Be polite and courteous: the person reviewing might be busy.
Now you are ready to create your first pull request: do this by clicking on "Create a pull request".
Reviewing a PR
Once you have opened your PR it will be reviewed. The review might ask for some changes:
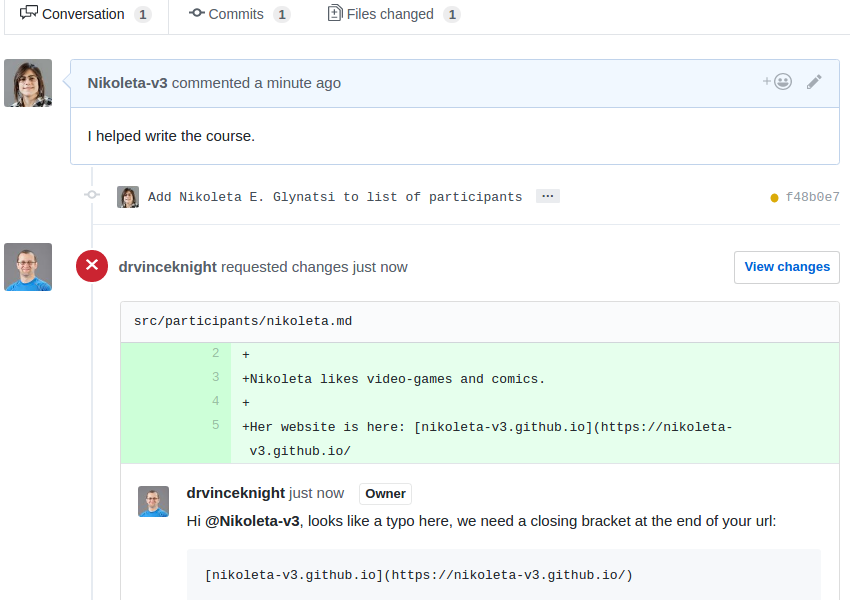
If that's the case, make the changes locally, on the same branch. Stage and commit the changes. Then push them back to the same remote branch. This will automatically update the PR.
Reviewing a PR (or more generally: doing a "code review") should be a helpful and positive experience for all involved. When you have the opportunity to (you will in the last part of this workshop) keep the following principles in mind:
- Do not request changes based on familiarity biais. Someone might not do something in the same way you have but unless there is an objective reason (not following a style guide, inefficiency etc...) there is no need to ask for such a change.
- Do not be vague:
change this algorithm so that it evaluates terms based on
  number of prime factors
could be vague and confusing. Offer constructive and clear requests: including actual snippets of code. - When suggesting specific lines of code: make sure you have tried them yourself. This indeed would take time and a good code review does take time.
- Provide context: if there is a specific reason for a request, include the context.
- Be positive: use "let us change this function to do this" as opposed to "I don't like your function".
- Be polite and courteous: because life is short.
It is important to remember that if done well, a review of a PR should be a conversation.
Tip
When putting code online if you would like to tell people that they can use it take a look at licences.