SAS Chapter 1 - Introduction
1.1 The Environment
SAS may be run in a variety of modes, on this course we will concentrate on the interactive mode which allows users to submit selected portions of SAS code through a graphical user interface (GUI). When opening SAS a variety of windows immediately become visible as shown. Note that the screenshots and accompanying screen casts for this course were produced with SAS 9.3 running on ubuntu 11.10. The look and feel on other operating systems will differ slightly.
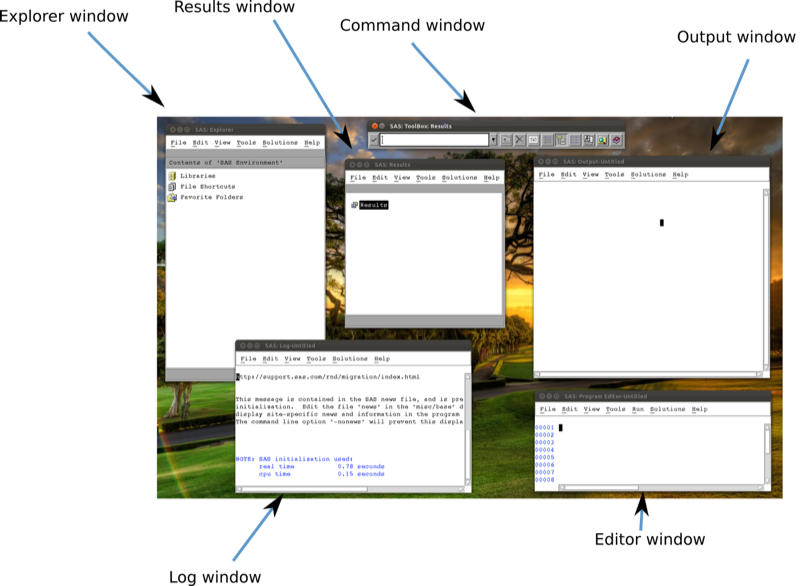
The visible windows are:
- The explorer window
- The results window
- The command window
- The output window
- The log window
- The editor window
We write code directly in the editor window and the roles of the other windows will become clear shortly.
1.2 Libraries
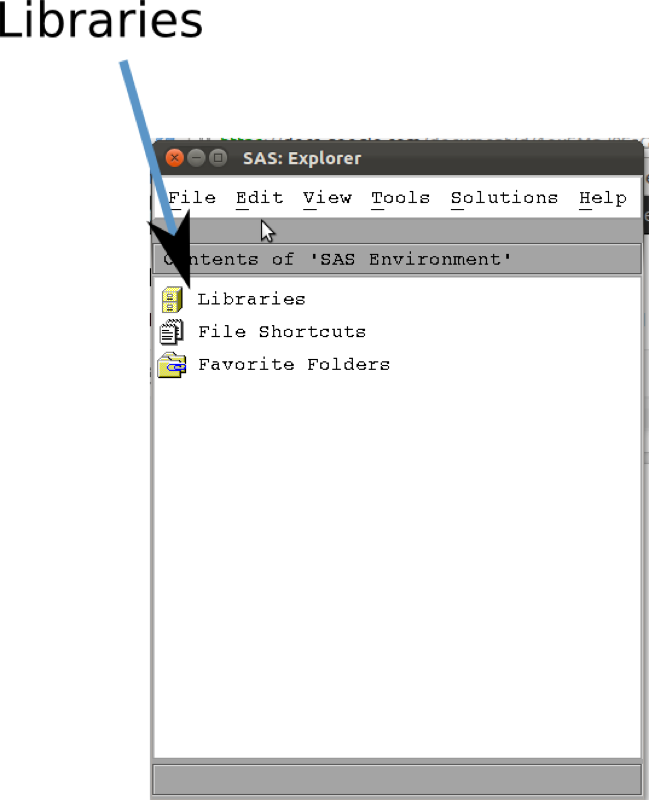
The major strength of SAS is its ability to handle huge data sets. SAS does this by storing files in a particular format in spaces called libraries. SAS libraries are important. SAS manipulates data sets once they are converted to SAS data files. These data files are saved in libraries in SAS. They work just like folders (apart from not being able to nest further libraries). If you click on the libraries tab in the explorer window (as shown in in the screenshot) you should see the libraries available to you (as shown in the other screenshot).
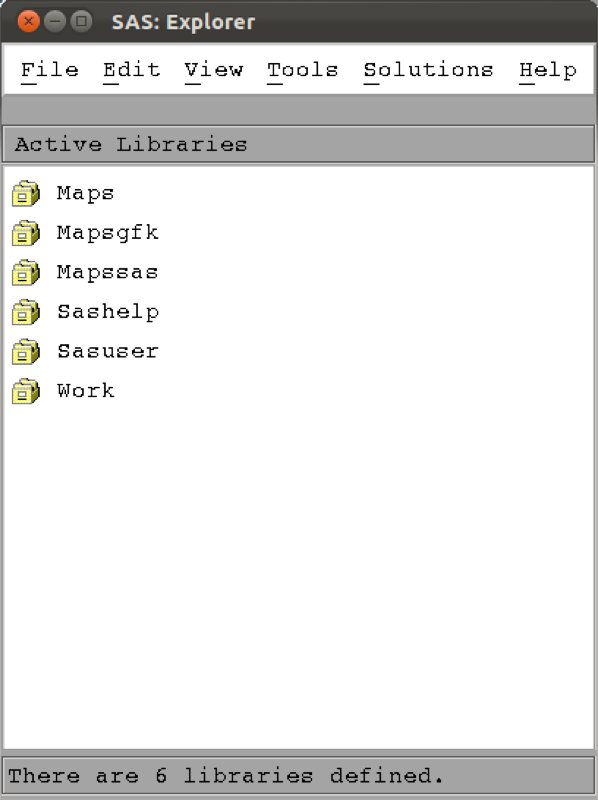
On my system SAS has already created 6 libraries (this might differ on other versions and operating systems). The Work library which SAS automatically uses if no library is specified (more on this later, it's basically the default library). A very important fact about the Work library is that it is temporary. When SAS is shut down, all the contents of the Work library are deleted. Keeping this in mind, let's move on to creating a new library.
1.2.1 Creating a new library
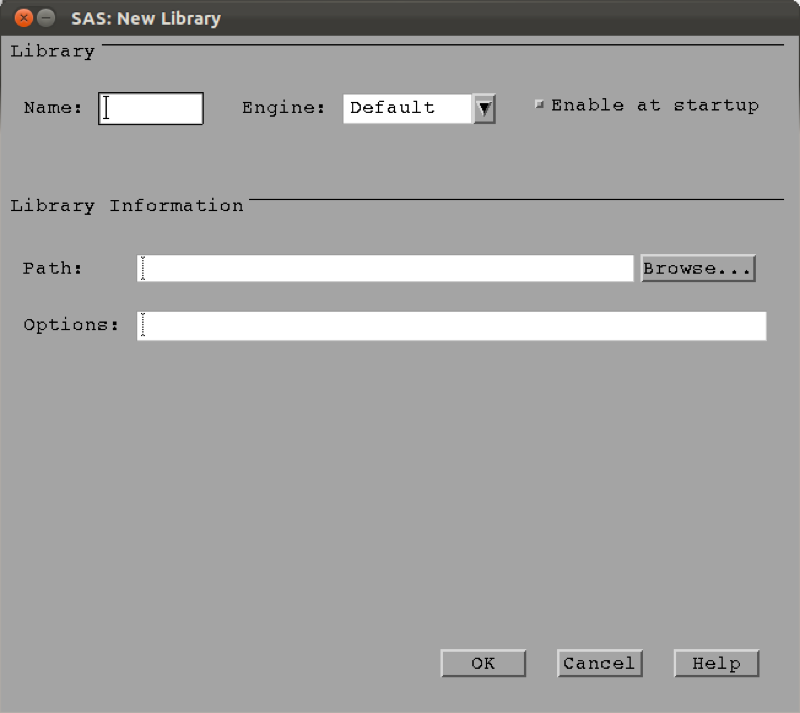
To create a new library, left click in the explorer window and select "New...". You will see a new window appear as shown. Simply browse to the location on your computer at which you'd like your new library to be stored. Note also to click the "Enable at startup" option which ensures that SAS remembers this library the next time you open up SAS; if this is not selected, the link to the library created will be temporary (and erased when SAS is shut down). Finally make sure you name your library obeying the following rules (for the rest of the notes, I'll assume the library name for this course is mat013):
- be less than or equal to 8 characters
- must begin with an underscore or letter
- remaining characters can be letters, numbers or underscores
Now that we have a library let's import some data!
1.3 Importing Data
There are two main ways to import data into SAS:
- Direct input
- Importing an external data set (xls, csv etc...)
In practice you will never use the direct input method but let's take a look for completeness (although it is very useful when wanting to quickly test a few things). This will also give us our first experience of the editor window!
Let us create a data set named first_data_set, put it in the mat013 library and include the following data:
Name,Age
Bob,23
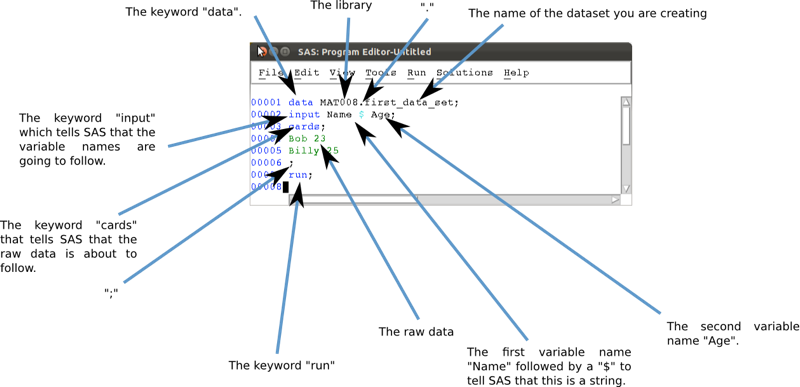
Billy,25To do so, write the following code in the editor window:
data mat013.first_data_set;
input Name $ Age;
cards;
Bob 23
Billy 25
;
run;
Let's take a look at the screenshot. First of all we see that the program editor automatically includes some syntax colouring (i.e. changes the colour of some of the words that it recognises). In blue in the editor window are the SAS keywords:
datawhich tells SAS that we're about to write adata stepwhich we'll look at a bit closer in the Chapter 3. The keyword data is always followed by the library and the data file (separated by a.) we're creating. If no library is given then SAS will put this file in the Work library.inputwhich tells SAS that we're going to input raw data and what follows is the name of the variables. If a variable is a string then we must include a\$after the variable name.cardswhich is the SAS keyword that precedes the raw data. All the entries must be on separate rows.runwhich is the keyword that tells SAS where the statement ends.
An important thing to remember is that a SAS statement always ends with a ;. Forgetting the ; is a common source of mistakes (and headaches).
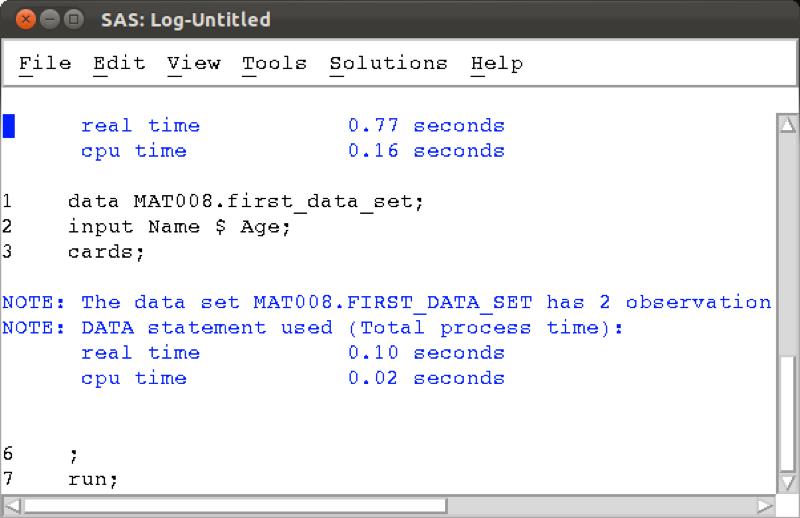
We run this code by highlighting it and pressing the 'running man', clicking on run (or pressing F8 on Windows). It is good practice to always check the log window as soon as any code is run. In the screenshot we see that the log looks good (lines 1-7 don't show any errors) and simply gives some details as to the running of the program.
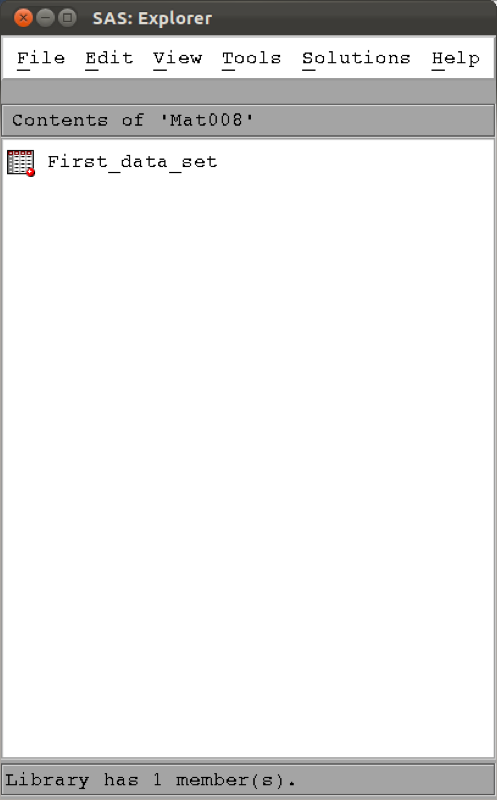
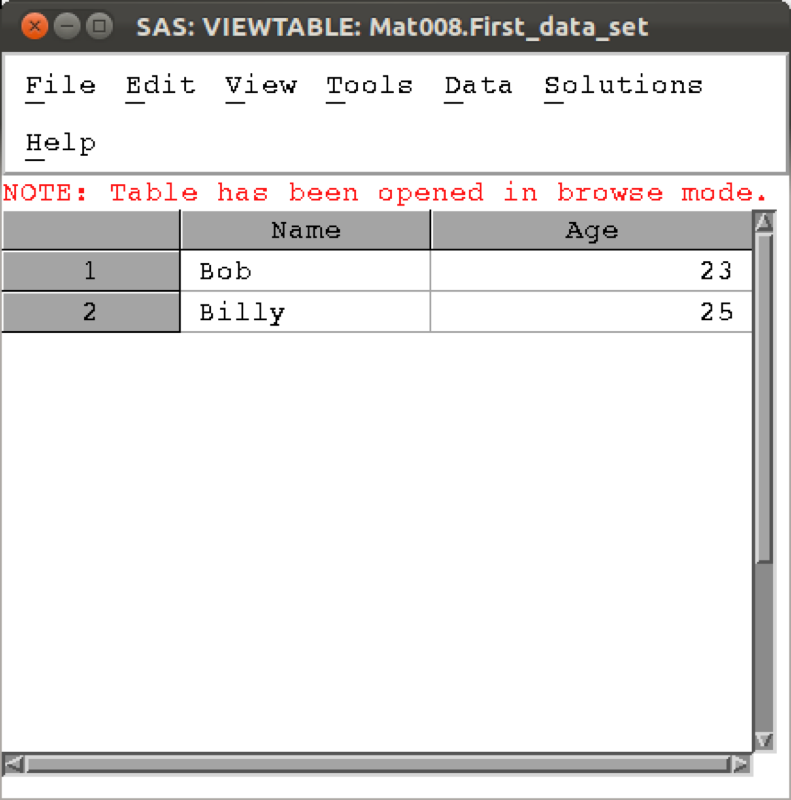
If we now look at the mat013 library in the explorer pane we can see the new data set is in there, double clicking on the data set opens it up.
Using direct input is of course not at all realistic when trying to import larger data sets.
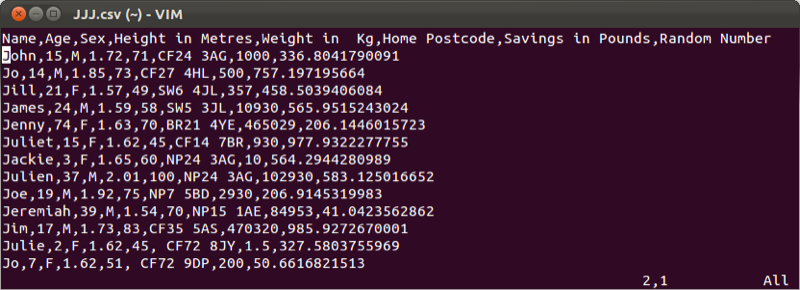
Often large data sets will be saved in comma-separated values (csv) format which can be read by most (all?) software. We will import the data set shown (here viewed in a simple text editor).
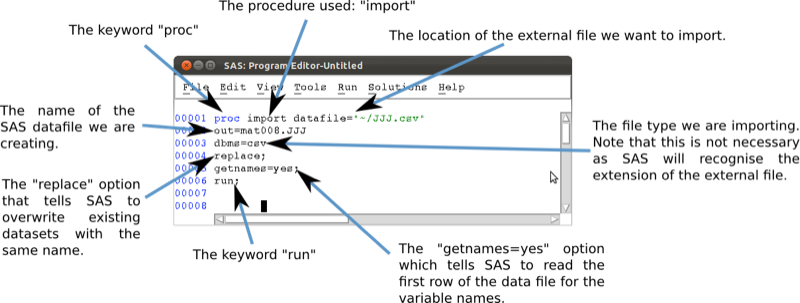
We will import this data set in to the mat013 library and call it JJJ using the following code:
proc import datafile="~/JJJ.csv"
    out=mat013.JJJ
    dbms=csv
    replace;
    getnames=yes;
run;
Let's take a look at the screenshot shown. We again see that the program editor automatically includes some syntax colouring (i.e. changes the colour of some of the words that it recognises). In blue in the editor window are the SAS keywords:
procwhich tells SAS that we're about to write a 'procedure step' which we'll look at a bit closer in the next chapter. Theprockeyword is always followed by the name of the particular procedure we're going to use. In this case:import, which is then followed by the statementdatafile=path-to-datafile. Following this are various options relating to the import statement.out- this tells SAS the name of the SAS datafile created from the imported file.dbms- this tells SAS the type of file being imported (in our case csv, but can bedlm,xls, etc.). Note that this is not necessary if SAS can recognise the file extension.replace- this tells SAS to replace any SAS datafiles with the same name as specified byout.getnames=yeswhich, although this is not a SAS keyword, it is a special option for the import statement that allows you to tell SAS to get the variable names from the first row of your external data file.runis the keyword that tells SAS where the statement ends.
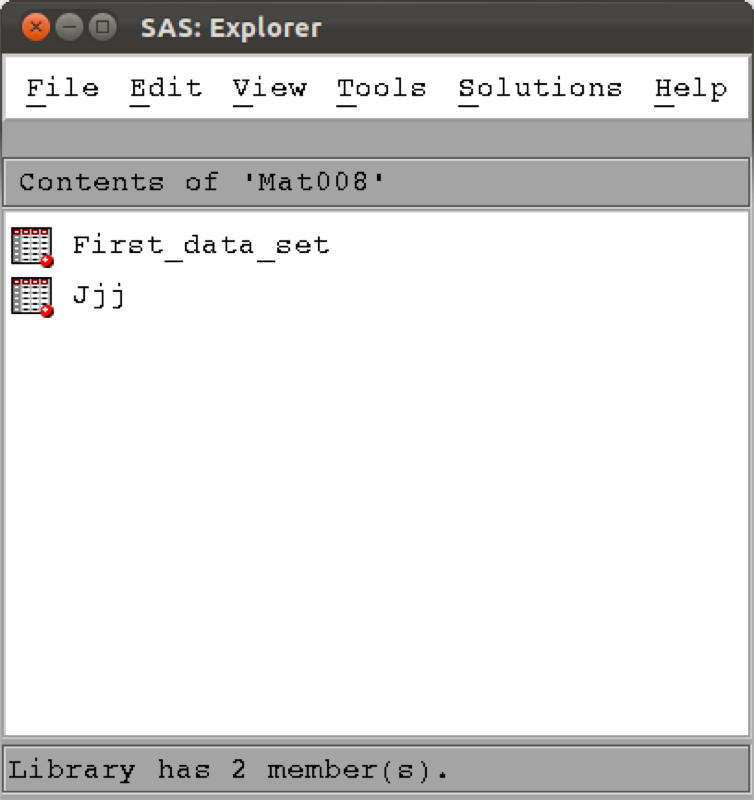
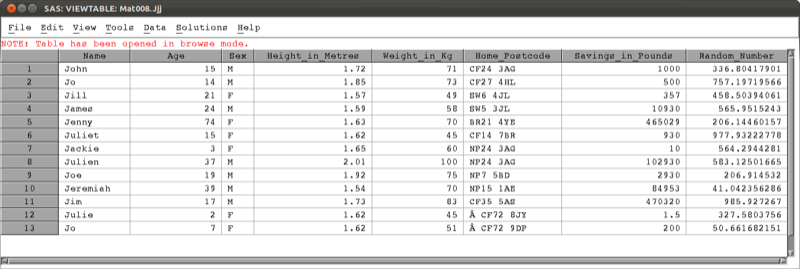
Running the code in the same way as before (highlighting and F8) will create the required datafile as shown.
In the following chapters we will learn how to create new data sets from old data sets and as such it may become necessary to export files to csv.
1.4 Exporting data sets
We will export our first data set ("mat013.first_dataset") to csv using the following code:
proc export data=mat013.first_data_set
    outfile="~/Desktop/first_data_set.csv"
    dbms=csv
    replace;
run;
Let's take a look at the screenshot shown. In blue are the SAS keywords:
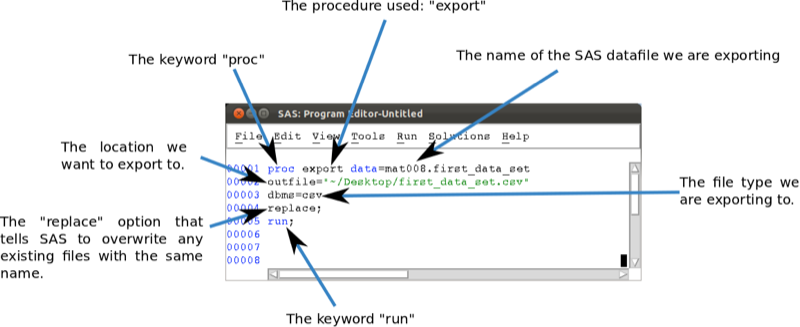
procwhich tells SAS that we're about to write a 'procedure step' which we'll look at a bit closer in the next chapter. Theprockeyword is always followed by the name of the particular procedure we're going to use. In this case:export, which is then followed by the statementdata=followed by the library and name of the SAS data file you want to export. Following this are various options relating to the export statement.outfile- this tells SAS where the exported file should go.dbms- this tells SAS the type of file to create when exporting (in our case csv, but can bedlm,xls, etc...). Note that this is not necessary if SAS can recognise the file extension.replace- this tells SAS to replace any file with the same name as specified byoutfile.runis the keyword that tells SAS where the statement ends.
In the next chapter we will see more complex (and potentially useful) procedures.